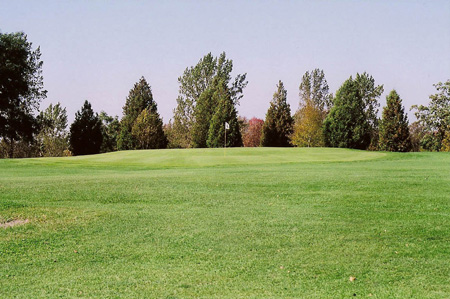
Course Tour
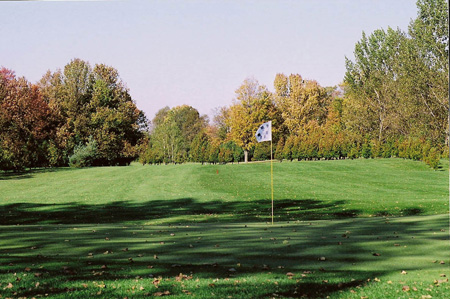
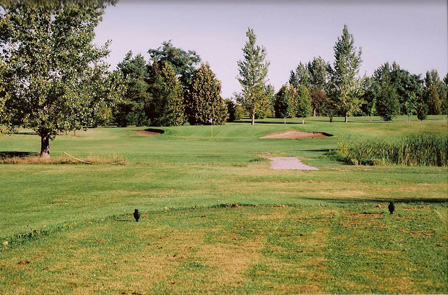
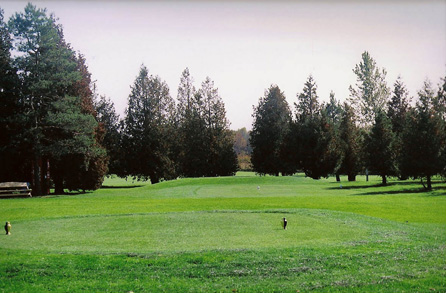
Hole #1
DIST (yds) PAR HCP WHITE 308 4 7 GOLD 287 4 9
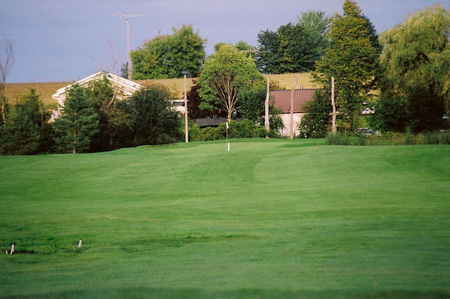
The round begins off a new, slightly elevated tee. Out of bounds runs the entire right hand side of the hole and a ball that way will result in going 3 off the tee right away. Pine and cedar trees scatter the left rough which means fairway is key. A good drive over and down the hill will leave a short second shot into the green. Beware, more O.B. behind the green as well as sand on the left and a water hazard on the right. The green slopes from back to front, towards the water and is very narrow. The centre of the green is a mere 6 paces wide.
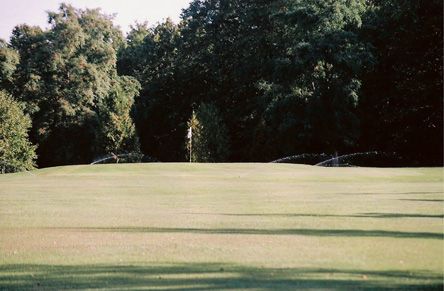
Hole #2
DIST (yds) PAR HCP WHITE 152 3 13 GOLD 130 3 17
The water off the tee is not in play and the key to this short par 3 is to avoid going long. The green has a drastic slope from back to front. Sand traps are tight to the edges of the green on each side. When the flag is at the top, going long makes it very difficult to stop the ball from rolling down off the front of the green. Short is safe and will leave an uphill chip.
Hole #3
DIST (yds) PAR HCP WHITE 200 3 11 GOLD 145 3 15
This par 3 is up hill all the way so an extra club is needed. Again the green slops from back to front but also has a vertical ridge in the centre of the green. Try to keep your ball on the same side as the flag so you don’t have to putt up the ridge and back down with your second shot.
Hole #4
DIST (yds) PAR HCP WHITE 354 4 9 GOLD 326 4 7
Straight away par 4. The bush runs down the entire right hand side of the hole and the fence line in the bush is out of bounds. Laying up short of the ridge will leave a full swing downhill to the green. Make sure that your tee shot does not get stuck behind one of the 3 trees that stand across the fairway. A tee shot that gets by the trees and over the rise will roll down closer to the green leaving a short pitch for your second shot. During mid summer this green becomes very tough to hold your ball on from long range.
Hole #5
DIST (yds) PAR HCP WHITE 397 4 1 GOLD 348 5 3
An uphill dogleg to the right. A left to right ball flight is needed to get around the corner. A strong drive that goes straight will likely carry through the fairway into the cedars that line the left side. Longer hitters can try and cut the corner by carrying their ball over the trees on the right. The second shot is uphill so take an extra club, two, if the flag is back left because you will get no roll. This green has three tiers, the highest being back left. The whole green slopes from left to right and back to front. A shot landing on the wrong side of the green will leave a putt either up or down 3 tiers.
Hole #6
DIST (yds) PAR HCP WHITE 279 4 17 GOLD 264 4 13
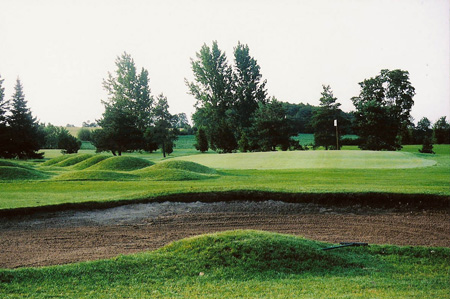
A good chance for a birdie here. This short par 4 is reachable for the longer hitters, but grass moguls guard the front of the green and a ball that goes in there is sure to have a ‘less then perfect’ lie. A bunker is on the right, if you can find the very narrow path between them, you will be in great shape. Otherwise, laying short of the moguls will leave a short pitch to the flag. The green has a ridge and slopes down towards the front and than the very back of the green runs away.
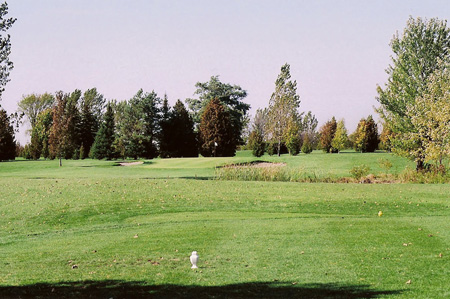
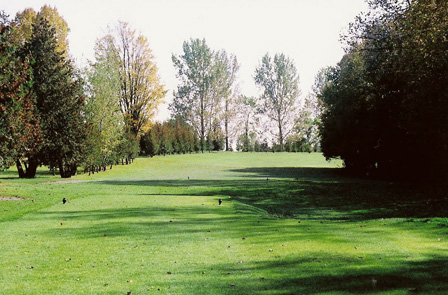
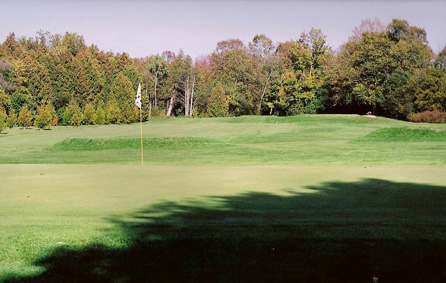
Hole #7
DIST (yds) PAR HCP WHITE 483 5 5 GOLD 439 5 1

Wait until you hear the bell ring before you hit. Fairway is important here as trees line the rough and may cause you to burn up a stroke chipping sideways. The pole indicates centre of the fairway. A drive down the left side will give you a look to attempt the green in 2, otherwise the large poplar trees on the right will block out the green and you will have to lay up to the corner. There are 3 large sand traps down the right hand approach to the green. There is a small ridge in the centre of this green but a ball placed on the same level as the hole will leave a legitimate chance at a 1 putt.
Hole #8
DIST (yds) PAR HCP WHITE 294 4 15 GOLD 277 4 11
Longer hitters can take their ball over the trees and may even make the green. There are two traps in front of the green, not visible when standing on the tee box. There is more space between sand and the green then there looks. The front right side of this green falls off quickly. The majority of the green slopes toward the water.
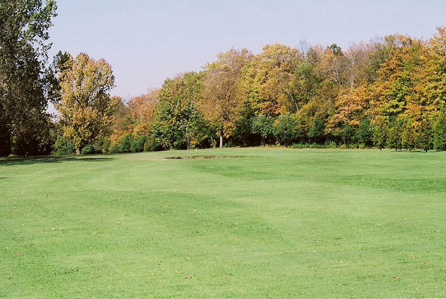
Hole #9
DIST (yds) PAR HCP WHITE 366 4 3 GOLD 355 5 5
The famous elm tree. Standing dead centre of the 9th fairway is a huge elm tree that has ruined more then its fair share of rounds. The out of bounds driving range on the right runs the full length of the hole. The tee shot must be shaped around the tree unless you are confident enough you can fly over it. The fairway slopes from left to right meaning a ball landing left side of the fairway should bounce slightly towards centre. The green has 2 distinct tiers and the bunkers on either side should be avoided.
Hole #10
DIST (yds) PAR HCP BLUE 347 4 8 GREEN 327 4 10
The back nine at Crestwood is very unique in that you play to the same nine greens you just played except from entirely different tees. The tee for 10 is back and closer to the road which changes the angle to the tee shot. It should take the road more out of play because the angle points you back toward the left.

Hole #11
DIST (yds) PAR HCP BLUE 120 3 18 GREEN 111 3 16
A shorter, straighter par 3 this time. You find yourself directly inline with the green with a short club in hand. Too much spin however usually means your ball can hit up top and spin its way back down the hill. Make sure you check the wind and then swing away.
Hole #12
DIST (yds) PAR HCP BLUE 160 3 14 GREEN 142 3 18
Shorter and a different angle completely. This tee box is aimed more to the left section of green. If the flag is on the right hand side it becomes tough to get your ball to stay close to the hole.
Hole #13
DIST (yds) PAR HCP BLUE 452 5 12 GREEN 422 5 6
Last time around it was a straight away par 4, this time a par 5. Check the wind, if it is behind you or calm, you may be able to fly the water with your tee shot. It is about 265 yards to carry the water and 240 to the front of it. Avoid the big trees again with your second shot as the hole goes back to the left and down the hill. With two good shots, you should be on or near the green and a great chance for birdie.
Hole #14
DIST (yds) PAR HCP BLUE 377 4 2 GREEN 348 5 4
This is one of the only holes that plays almost the same as the front nine. 14 is just slightly shorter than no. 5 so this time it should be easier to go over the corner of the trees. By now you should know where the flag is on the green, which gives you a better target to aim your second shot.
Hole #15
DIST (yds) PAR HCP BLUE 254 4 16 GREEN 242 4 14
This hole is possibly the easiest on the course. Even shorter than the first time and has an elevated tee so you can see the green. A driver may be too much club for some players and it is never a bad play to hit down in front of the moguls to leave a short pitch.
Hole #16
DIST (yds) PAR HCP BLUE 498 5 6 GREEN 439 5 2
At about 20 yards farther than number 7 it makes this hole much tougher to hit in two shots. The drive will be a bit further back in the fairway and now may be blocked from the green by the poplar trees on the right. A lay up still leaves a wedge for a 3rd shot and a good chance at a birdie.
Hole #17
DIST (yds) PAR HCP BLUE 215 3 10 GREEN 194 3 12
This may be the toughest change from front to back. What was a short par 4 is now a 215 yard par 3. The bunkers need to be carried, or hit your ball in between them for a decent chance at par. Check the wind at the hole because trees block it from the tee and you may not realize the effect it may have on your ball until its too late.
Hole #18
DIST (yds) PAR HCP BLUE 383 4 4 GREEN 375 5 8
If you managed to hit over the elm tree the first round, you should have no problems this time as the tee is elevated. It is also moved to the left which opens up the area left of the elm to get your ball around it.

27 Little Britain Rd. Manilla,
Ontario K0M 2J0
Phone: 705-357-3112
Toll Free: 1-888-411-2160
Email: info@crestwoodgolfclub.com